TEST 2: Applying 12 V To Solenoid A And B


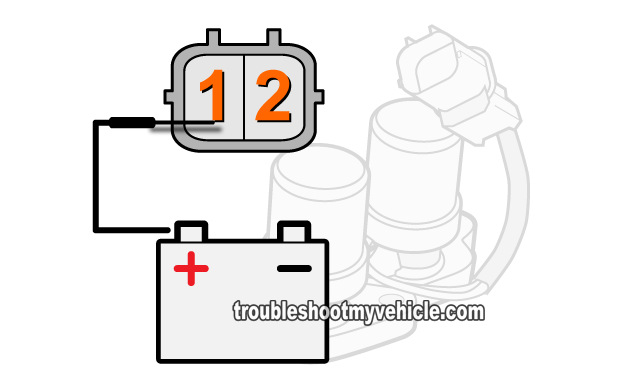
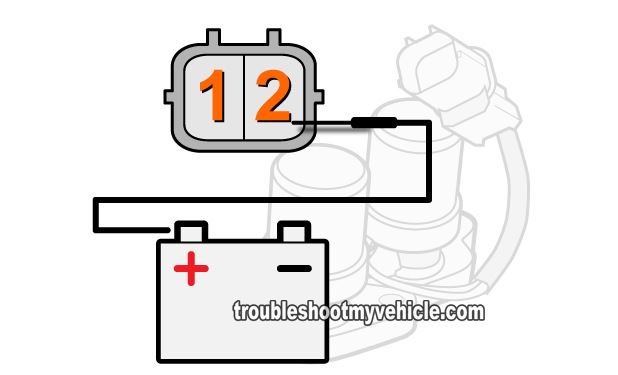
If you've reached this point, you have verified that shift solenoid A and/or B's internal resistance is between 14 to 25 Ωs, the next step is to apply 12 Volts directly to it from your Civic's battery.
This is a pretty simple test, but you'll need to take a few precautions. The first is to use a ‘fused’ jumper wire to apply this voltage from your Civic's battery.
You can make your own ‘fused’ jumper wire by putting a 10 or 15 amp fuse between the wire and your Honda Civic's battery positive post.
The other is to remember that the shift solenoid assembly gets Ground thru' its base. So if you've removed the shift solenoid assembly from your Civic's automatic transmission, you'll need to Ground it to the battery negative (-) terminal using something like a jump-start cable.
NOTE: The instructions below assume that the shift solenoid assembly is still mounted to the automatic transmission.
These are the test steps:
- 1
Unplug the shift solenoid assembly from its electrical connector.
NOTE: This test is done on the shift solenoid assembly's connector AND NOT on the engine wiring harness connector. - 2
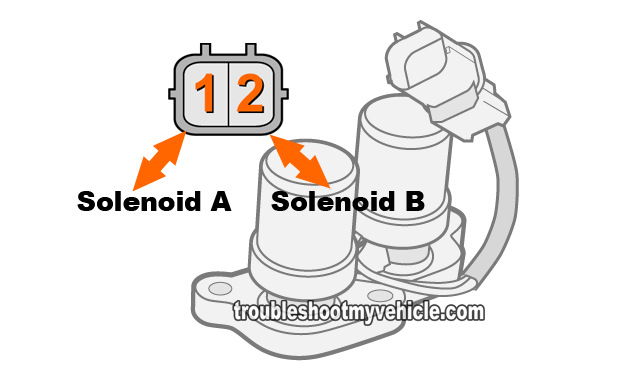
Apply 12 Volts to terminal #1, of the shift solenoid assembly's connector, using a jumper wire or a power probe to test shift solenoid A.
- 3
Apply 12 Volts to terminal #2, of the shift solenoid assembly's connector, using a jumper wire or a power probe to test shift solenoid B.
- 4
You should hear an audible click when the 12 Volts are applied.
Repeat this test as many times as you need to be certain of your test results.
Let's examine your test results:
CASE 1: Solenoid valve A and/or B clicked when you applied 12 Volts. This test result tells you that the solenoid is opening and closing.
Since you've reached this point from TEST 1 (which means that shift solenoid A and/or B passed the resistance test), this test result indicates that the shift solenoid assembly is OK and not the cause of the transmission issue.
CASE 2: Solenoid valve A and/or B DID NOT click when you applied 12 Volts. This test result tells you that shift solenoid A and/or B is bad and needs to be replaced.
Since shift solenoid A and/or B is part of the shift solenoid assembly, you'll need to replace the entire assembly to solve the issue.
Solenoid Assembly Is Good But Transmission Still Not Shifting

If you've tested and found either solenoid (shift solenoid A or B) good and your Honda's transmission isn't slipping yet a shift solenoid A or B trouble code keeps popping up, I want to suggest two things:
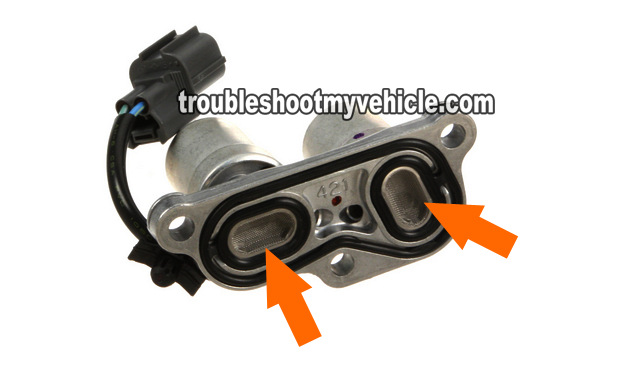
- Remove the solenoid assembly and see if the metal mesh screen filters are clogged and if they are, you should clean them (see photo). Several people have reported that this has solved the issue.
- Check the continuity of the wires between the solenoid assembly and the PCM. You'll need a wiring diagram of your specific Honda to accomplish this test.
Also, and especially after finding no faults in the wiring, there's a good chance that you'll have to replace the shift solenoid assembly to completely eliminate it as the source of the problem. I know this isn't something you want to hear, but in some cases this is a necessary thing.
Now, if your Honda Civic's transmission is slipping, then replacing the shift solenoid assembly isn't gonna' help bring the transmission back to normal. Slippage is a direct result of internal damage to the friction discs or hard parts. The only way to solve a slippage issue is overhauling the transmission.
More 1.6L Honda Civic Test Articles
If this tutorial helped then you might be interested in the others found here: 1.6L Honda Civic Index Of Articles.
Here's a sample of the articles you'll find in the index:
- How To Test Trouble Code P0135 (1995-2000 Honda 1.6L).
- How To Test: Lock-up Control Solenoid Valves (1996-2000 1.6L Honda Civic).
- How To Troubleshoot A No Start (1995-2000 1.6L Honda Civic).
- How To Test The Igniter, Ignition Coil Accord, Civic, CRV, and Odyssey (at: easyautodiagnostics.com).

If this info saved the day, buy me a beer!


