Interpreting The Results Of The Engine Compression Test
If you got a low compression reading, the next step is to find out if this reading is varying by more than 15% than the other cylinders (because if it is varying by more than 15%, then this cylinder is considered 'dead'), this is how you can find out:
- Grab a calculator and multiply the highest compression reading that you recorded by 0.15.
- So, let's say that cylinder #4 gave you the highest reading of 170 PSI. Well 170 X 0.15 gives you 26 (25.5 rounded off).
- Now, the next step is to subtract 26 from 170, which gives us 144 PSI.
- So then, 144 PSI is the lowest possible compression reading that any one of the rest of the engine cylinders can have. Any compression reading below this and that engine cylinder will misfire.
Now, so that this calculation can make more sense to you, let's say that my Honda gave me the following compression readings:
- Cylinder #1 165 PSI.
- Cylinder #2 170 PSI.
- Cylinder #3 175 PSI.
- Cylinder #4 30 PSI.
- Cylinder #5 165 PSI.
- Cylinder #6 175 PSI.
The next step is to do the math: 175 x 0.15= 26, 175-26= 149. So, now I know that cylinder #4 is the one causing the misfire!!
Now that you've found the cylinder with the low compression, the next step is to see if this low compression is caused by worn cylinder head valves or worn piston rings. For this test, go to: TEST 2: 'Wet' Engine Compression Test.
TEST 2: 'Wet' Engine Compression Test

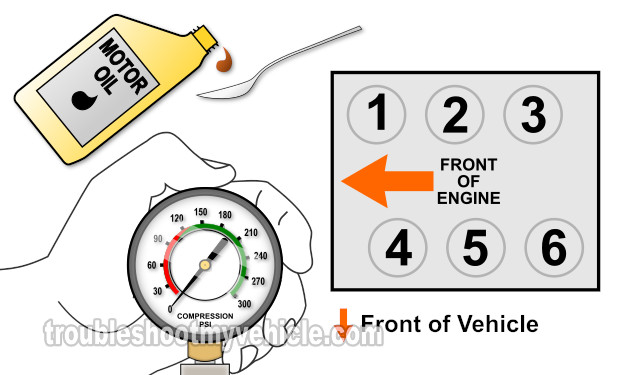
After confirming that you do have a cylinder or cylinders with low compression (or with 0 PSI compression), the next step is to do a 'wet' compression test.
To do a 'wet' compression test, all we have to do is add about two tablespoons of oil to the confirmed 'dead' engine cylinder or cylinders.
Depending on the compression test result of the cylinder you added oil to, you'll be able to determine if the low compression reading you recorded in the 'dry' compression test is caused by worn piston rings or worn cylinder head valves.
OK, this is what you need to do:
- 1
Add a small amount of engine oil to the cylinder that reported low compression or no compression in the 'dry' compression test.
The amount should be about 1 to 2 tablespoons of oil. - 2
Install the compression tester onto the cylinder.
Do not use any type of tool to tighten the compression tester, hand tight is fine. - 3
When all is set up, have your helper crank the engine.
- 4
You'll get one of two results
1) The compression value will go up (from the one you recorded before).
2) The compression value will stay the same.
Let's take a look at your test results:
CASE 1: The compression value shot up. This tells you that the piston compression rings are worn out and thus the problem is in the bottom end (block) of the engine in your 2.7 or 3.0L Honda.
The reason why is that the oil you just added helped the piston rings seal better, thus causing the compression reading to rise.
CASE 2: The compression value stayed the same. This confirms that the problem is in the cylinder head valves.
The reason for this is that nothing, not even the engine oil, can help the cylinder head valves seal the compression in. So, after adding oil and retesting the compression, the compression value doesn't increase, then you now know that the problem is in the cylinder head valves.
Related Test Articles
You can find all of the 3.0L V6 Honda equipped vehicle articles here: Honda 3.0L Index Of Articles.
Here's a sample of the tutorials you'll find in the index:
- How To Test The Coil on Plug Ignition Coil (Honda 3.0L) (at: easyautodiagnostics.com).
- The Basics Of Crank And Cam Sensors And How To Test Them (at: easyautodiagnostics.com).

If this info saved the day, buy me a beer!


