
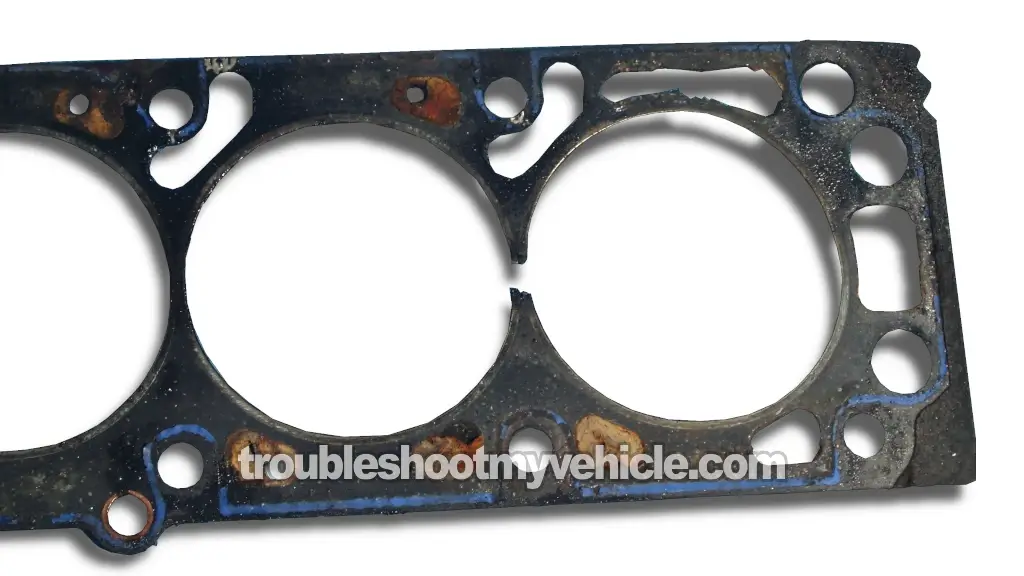
Testing for a blown head gasket isn't that difficult. Now, hopefully the engine in your Oldsmobile Alero hasn't suffered a blown head gasket, but if you suspect it has, in this tutorial I'm going to show you the four tests that you can do to find out.
Two of these tests don't require any tools whatsoever, and you can get them done in under five minutes. The other two are a compression test, which of course requires a compression tester, and a block test that's done with a combustion leak detector. If you don't have these tools, I'll show you where you can save a few bucks on their purchase.
By the end of this tutorial, you'll be able to quickly and easily find out whether you've got a blown head gasket or not on your 3.4L V6 Oldsmobile Alero.
Contents of this tutorial:
ES  You can find this tutorial in Spanish here: Cómo Verificar Un Empaque De Cabeza Quemado (1999-2004 3.4L V6 Oldsmobile Alero) (at: autotecnico-online.com).
APPLIES TO: This tutorial applies to the following vehicles:
- 3.4L V6 Oldsmobile Alero: 1999, 2000, 2001, 2002, 2003, 2004.
Symptoms Of A Blown Head Gasket
For the most part, a failure in one or both of the head gaskets on your Oldsmobile Alero boils down to one of these two issues:
- The engine cranks but doesn't start.
- The engine starts and runs, but it overheats within minutes and for no apparent reason.
Depending on the type and extent of the head gasket failure on your 3.4L V6 Oldsmobile Alero, you're going to see one or more of the following symptoms:
- Engine overheating: The engine overheats even though the rest of the cooling system (radiator, thermostat, water pump, cooling fans, etc.) appears to be working correctly.
- White exhaust smoke: Thick white smoke with a sweet coolant smell comes out of the tailpipe.
- Engine no-start: The engine cranks normally but won't start.
- Milky-white engine oil: The engine oil has a milky light-brown or whitish color because coolant has mixed with the oil.
TEST 1: Engine Oil The Color Of Coffee With Too Much Creamer
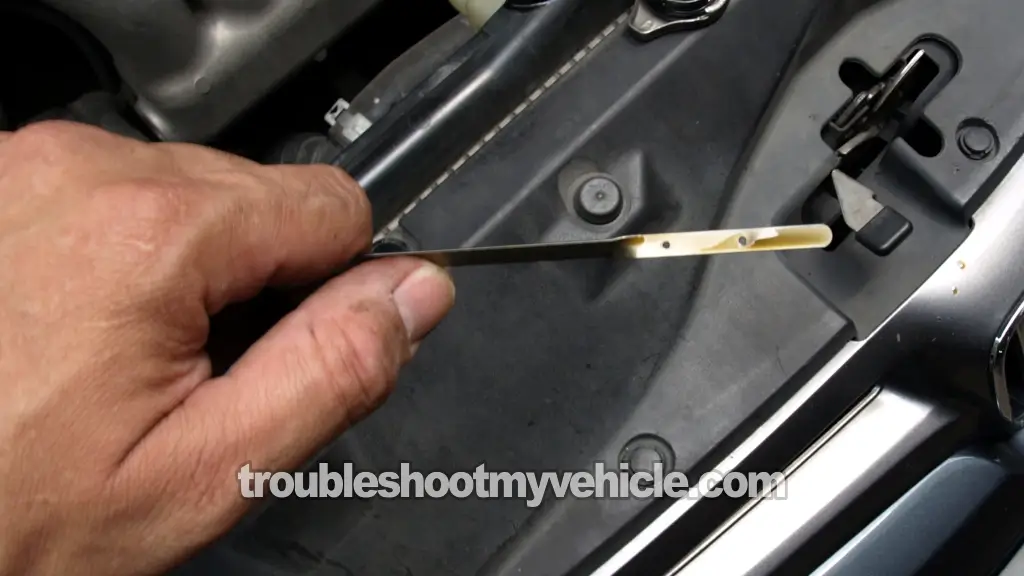
I think that the most common end result of one or both head gaskets failing on your 3.4L V6 Oldsmobile Alero is coolant entering the crankcase. When this happens, the coolant mixes with the oil, and the engine oil turns into something that resembles coffee with too much creamer.
Yep, the oil is going to have a milky white color to it. And that's what we're going to check for in this first test section.
Specifically, here's what we're looking for:
- If the oil on the engine oil dipstick has a milky white color, you've got a blown head gasket on your hands.
- If the oil looks OK (as in, not a milky white color, just its old, dirty self), we'll move on to TEST 2.
Let's begin.
- 1
Open the hood.
- 2
Remove the engine oil dipstick.
- 3
Inspect the oil on the end of the dipstick.
- 4
You'll see one of two results:
1.) The oil has a milky-white color that resembles coffee with too much creamer.
2.) The oil has its normal color and consistency.
Now let's interpret your test results:
CASE 1: The engine oil looks like coffee with too much creamer. This confirms that coolant has mixed with the engine oil. In most cases, this means the head gasket has failed, although a cracked cylinder head or engine block can produce the same result.
CASE 2: The engine oil looks normal. This is the most common result and doesn't rule out a blown head gasket. We've still got a few more tests to perform.
Our next step is to check whether combustion pressure is leaking into the cooling system. For that test, head over to: TEST 2: Coolant Shooting Out From Open Radiator.
TEST 2: Coolant Shooting Out From Open Radiator
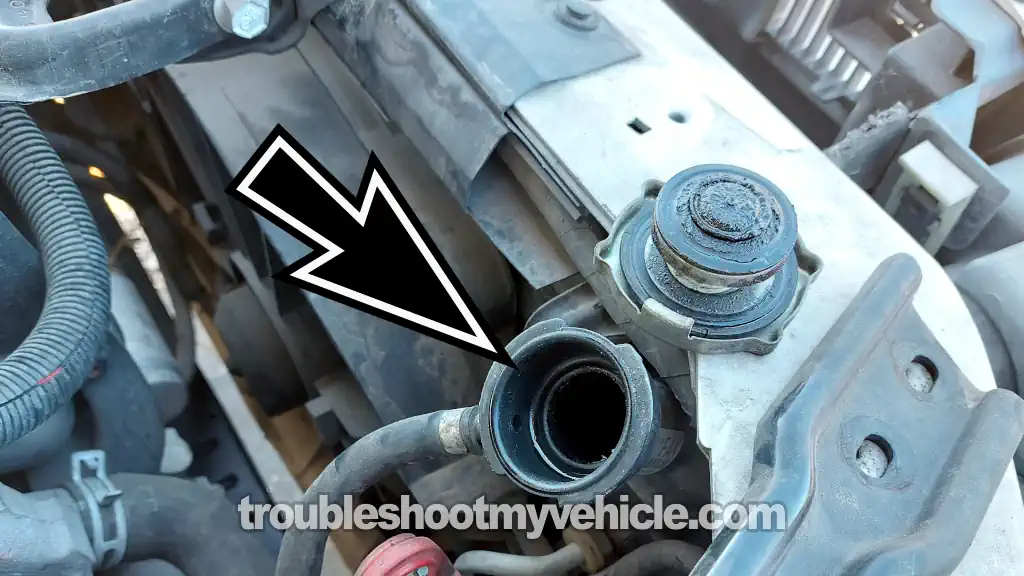
The second most common way that a head gasket fails is by allowing combustion gases and compression pressures to leak into the engine's cooling system (radiator).
The test that we can do to confirm this very common type of failure is simply to remove the radiator cap from the radiator. Or, if the vehicle doesn't come equipped with a radiator cap but instead has a pressurized coolant reservoir, we'll remove the cap from that.
We'll then have a helper crank the engine and see what happens:
- If the coolant remains undisturbed in the radiator while the engine is cranking, then we can move on to the next test.
- If the coolant gets shot out of the radiator as the engine is cranking, then it's confirmed. We've got a blown head gasket on our hands.
IMPORTANT: Never remove the radiator cap while the engine is hot or even warm. Always let the engine cool down completely first. Otherwise, the cooling system may still be under pressure, and hot coolant can spray out and cause serious burns.
Let's get started:
- 1
Remove the radiator cap.
Before continuing, make sure the coolant level is near the top of the radiator. If necessary, add coolant or water. - 2
Have your helper crank the engine while you watch the coolant in the radiator from a safe distance.
- 3
You'll see one of two results:
1.) The coolant surges upward or shoots out of the radiator neck while the engine is cranking.
2.) The coolant remains undisturbed. In other words, cranking the engine has little or no effect on the coolant level inside the radiator.
Now let's interpret your test results:
CASE 1: The coolant surged or shot out of the open radiator while the engine was being cranked. This confirms that combustion pressure is entering the cooling system. In most cases, this means you've got a blown head gasket, although a cracked cylinder head or engine block can produce the same result.
CASE 2: The coolant remained undisturbed. This is the correct and expected test result. It tells you that combustion pressure isn't leaking into the cooling system.
If your Oldsmobile Alero starts and runs with a cylinder misfire, our next step is to check the engine's compression. For that test, go to: TEST 3: Engine Compression Test.
If the engine starts but overheats within a few minutes, then the next step is to perform a block test with a combustion leak tester. Go to: TEST 4: Using A Chemical Block Tester (Combustion Leak Tester).
TEST 3: Engine Compression Test
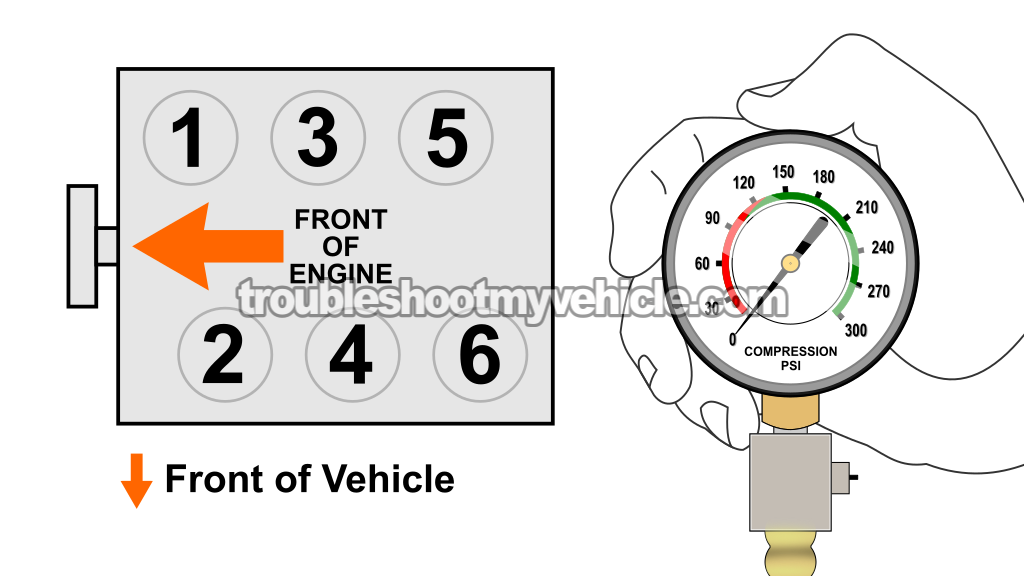
Another type of failure that I've seen quite a bit over the years is when the head gasket fails at a point right between two side-by-side cylinders. When this happens, the compression of one cylinder escapes into the other and vice versa.
The end result of this type of head gasket failure is an engine with two dead cylinders because they're producing zero PSI.
The most common symptom of this type of failure is that the engine starts and runs, but runs with two misfiring cylinders. In other words, you've got the V6 engine running on only four cylinders.
To find out if this is what's happened, we can do a compression test on all six cylinders. And if we've got two side-by-side cylinders from the same bank producing zero PSI, well, it's confirmed —we've got a blown head gasket on our hands.
NOTE: If you'd like more detailed instructions on how to perform a compression test and interpret the results, check out this tutorial: How To Test Engine Compression (1999-2004 3.4L V6 Oldsmobile Alero).
These are the test steps:
- 1
Disable the ignition system by unplugging the ignition control module (ICM) electrical connector.
- 2
Remove all six spark plugs.
- 3
Thread the compression tester into the spark plug hole for cylinder #1.
NOTE: Hand-tighten the compression tester only. Don't use any tools to tighten it. - 4
Have your helper crank the engine until the needle on the compression gauge stops climbing.
Once the needle stops moving, have your helper stop cranking the engine. - 5
Record the compression reading along with the cylinder number. You can use the cylinder identification illustration above as a reference.
- 6
Repeat steps 3 through 5 on the remaining cylinders.
Now let's interpret your test results:
CASE 1: Every cylinder produced a compression reading above 0 PSI. This tells you that neither head gasket has failed between two neighboring cylinders.
Our next step is to perform a chemical block test with a combustion leak tester. Go to: TEST 4: Using A Chemical Block Tester (Combustion Leak Tester).
CASE 2: Two neighboring cylinders had 0 PSI (or extremely low) compression. This confirms that the head gasket has failed between those two cylinders, allowing the compression pressure to leak back and forth between them.
TEST 4: Using A Chemical Block Tester (Combustion Leak Tester)
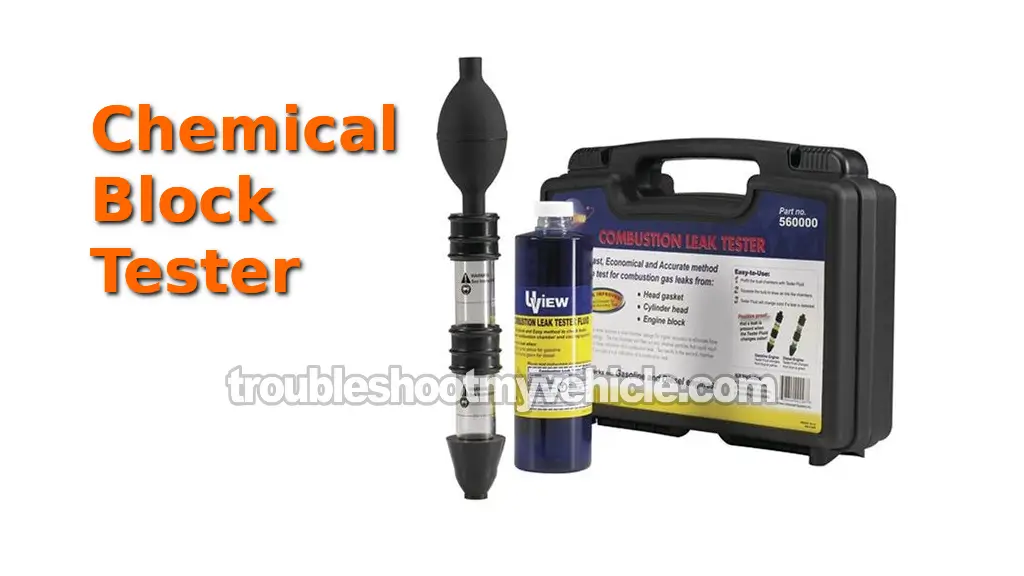
When one or both head gaskets are in the initial stages of failure, you're not going to see the engine oil mixed with coolant. You're not going to see the coolant being forcefully shot out of the open radiator. And of course, it'll pass the compression test with flying colors. But the head gasket failure will still cause some issues.
The most common issue is that the engine overheats within minutes of it being started and for no apparent reason. You know the fan motor is okay, you know the thermostat is okay, you've got plenty of coolant, and the water pump is fine, yet the engine overheats.
The only way to be able to pinpoint this to a blown head gasket is to do a block test with a combustion leak detector (commonly known as a block tester). This is the same equipment and test that a technician is going to use at the auto repair shop to diagnose a blown head gasket on just about any vehicle, and it's one that you can do yourself pretty easily.
A block test checks for combustion gases leaking into the engine's cooling system. If combustion gases are present in the radiator, you know there's an internal engine problem.
Here's a basic overview of how the test works:
- Add the test fluid: Fill the tester with the blue test fluid according to the manufacturer's instructions.
- Start the engine: Let the engine idle.
- Place the tester on the radiator: Install the tester on the open radiator neck. Depending on the coolant level, you may need to remove a little coolant so the tester can draw air from the radiator instead of coolant.
- Draw air through the tester: Squeeze and release the rubber bulb to pull air from the radiator through the test fluid.
- Watch for a color change: If the blue fluid turns yellow (on gasoline engines), combustion gases are present in the cooling system. This confirms a blown head gasket, a cracked cylinder head, or a cracked engine block.
- No color change: If the test fluid stays blue, combustion gases are not entering the cooling system. This lets you rule out a blown head gasket, cracked cylinder head, and cracked engine block as the cause of the overheating problem.
If you don't already have a combustion leak tester, you can usually find one at your local auto parts store or comparison shop for one here:


 20%
20%Disclosure: As an Amazon Associate, I earn from qualifying purchases. If my tutorials help you, using these links is an easy way to support the site at no extra cost to you. Thank you!
More 3.4L V6 Oldsmobile Alero Diagnostic Tutorials
You can find a complete list of diagnostics tutorials for your 3.4L V6 Oldsmobile Alero in this index:
Here's a small sample of the tutorials you'll find:
- How To Test Engine Compression (1999-2004 3.4L V6 Oldsmobile Alero).
- Common Causes Of Spark Plug Failure (1999-2004 3.4L V6 Olds Alero).
- How To Test The TPS With A Multimeter (1999-2004 3.4L V6 Oldsmobile Alero).
- How To Test The 7X Crankshaft Position Sensor (1994-2004 3.4L V6 Olds Alero).

If this info saved the day, buy me a beer!
