
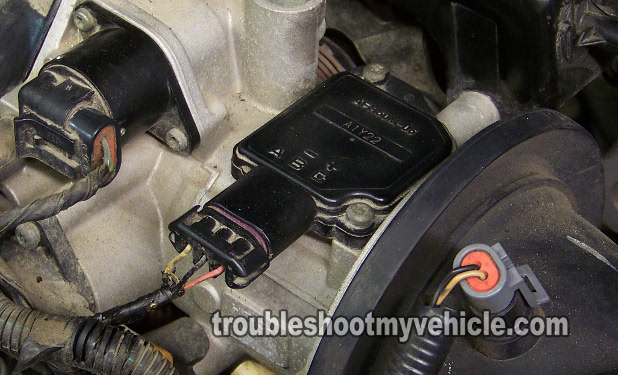
Cleaning the mass air flow sensor on your 3.3L, 3.8L (and some select 3.1L with a MAF sensor) is not hard at all.
In this article, I'll show you how to do it and more importantly, I'll shed some light on some important do's and don'ts when cleaning the MAF sensor on your GM vehicle.
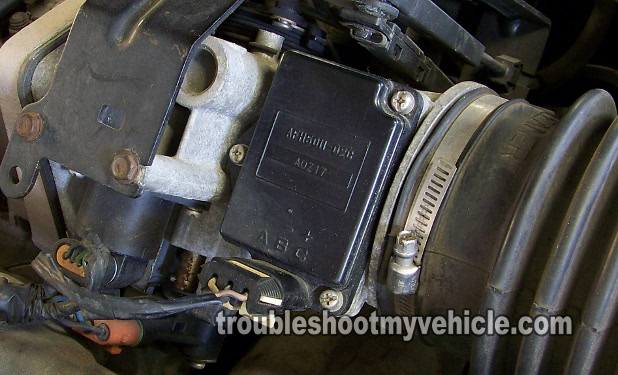
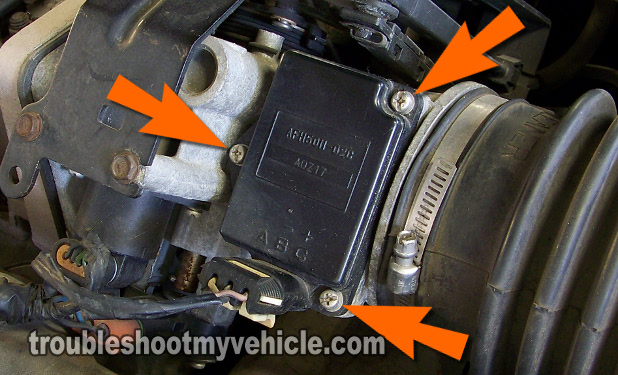
This article covers the two major types/styles of MAF sensor. The first type was used from 1989-1996 and you can see what this MAF sensor looks like by viewing image 2 of 2 in the image viewer above. The second type is used from 1996 to 2005 and it's the one in image 1 of 2 in the image viewer.
Contents of this tutorial:
ES  You can find this tutorial in Spanish here: Cómo Limpiar El Sensor De Flujo De Aire (MAF) (GM 3.3L, 3.8L) (at: autotecnico-online.com).
If the MAF sensor, on your specific GM vehicle, is not covered by this one, the following tutorial may apply:
- How To Test The GM MAF Sensor 3.1L, 3.4L, 4.3L, 5.0L and 5.7L (at: easyautodiagnostics.com).
Symptoms Of A Dirty MAF Sensor
The most common symptom, when the MAF sensor gets dirty (contaminated) is that the engine bogs down when you accelerate the car (or mini-van) but it will idle fine. But this doesn't always happen.
In some cases, a dirty MAF sensor doesn't really cause a lot of havoc with the way your engine runs.
What really sucks is that the PCM (Powertrain Control Module = Fuel Injection Computer) will not set a 'The MAF Sensor is Dirty' Trouble Code (and one doesn't exist).
But when it does get dirty you'll experience one of the following symptoms:
- Bad gas mileage.
- Check Engine Light on with:
- DTC P0171 (Lean Air Fuel Mixture), if your specific vehicle is OBD II equipped.
- Won't pass state mandated annual emission test.
- Lack of power when accelerating the vehicle.
The MAF sensor's job is to measure the amount of air entering the engine so that the PCM can know how much fuel to inject into each engine cylinder.
When the MAF sensor gets contaminated with dirt (and other stuff like oil), the MAF sensor still produces a signal but since the dirt interferes with the precise measurement ability of the MAF sensor, the PCM gets an incorrect measurement.
This results in the PCM ‘seeing’ less air entering the engine and thus less than the ideal amount of fuel being injected. The end result are symptoms caused by a leaner air/fuel mixture.
Before replacing the MAF sensor, you should check it to see if it's dirty and if it is, clean it before replacing it (since this may solve the problem).
Important Suggestions And Tips
TIP 1: The safest way to clean the MAF sensor's hot wires, is to just spray them. The MAF sensor's hot wire should never be cleaned by physically wiping them with a cotton swab. Touching the hot wires can break them (I learned this the hard way many years ago).
TIP 2: It's very important the you do not use carburetor spray cleaner or brake cleaner. Both of these are very harsh solvents and can damage the inner circuitry of the MAF sensor. If the MAF sensor wasn't bad to begin with, it will be -if you use these two solvents (this I can vouch for from personal experience too)
TIP 3: Do not use gasoline. Gasoline will leave a petroleum residue on the hot wires that will attract dirt, not to mention gasoline is just too dangerous to use as a cleaner.
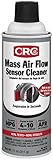
TIP 4: Your local Auto Parts (like AutoZone or O'Reilly Auto Parts) will have the appropriate MAF sensor cleaner. The most common/popular is the CRC mass air sensor cleaner (part number: 05110).
You don't have to use a dedicated MAF sensor cleaner since the CRC MAF sensor cleaner suffers from being a tad too expensive (but it beats using something unapproved and frying the MAF sensor) and so on occasion, I have also used a regular electronic spray cleaner (also called a computer duster spray) from my local Radio Shack or Fry's Electronics store with the same success.
OK, let's turn the page and get this show on the road.
Remove The MAF Sensor
OK, this is what you signed up for
Here are the actual removal and cleaning instructions for the MAF sensor.
Remember, this article covers two different types of MAF sensors. I've included photos of both in the image viewer. These may be in a slightly different place on your specific GM vehicle but this should not worry you, the steps apply to them all.
OK, this is what you need to do:
- 1
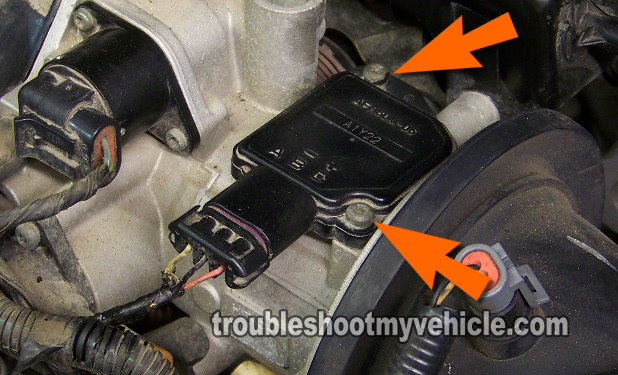
If your MAF sensor is bolted to a vehicle that's 1996 or newer, remove the two Torx head bolts that hold the MAF sensor in place (see photo 1).
If your vehicle is 1996 and older, the MAF sensor will have three Phillips head screws (small bolts) attaching the MAF to the throttle body, remove them now (see photo 2). - 2
Once the sensor is removed, it should look like the ones in photos 1 and 2 in the image viewer below.
If your GM vehicle uses the older type (photo 1 in the image viewer below), you have to be very careful not to damage the hot wires, since both are exposed and can be easily damaged/broken.
Clean The MAF Sensor
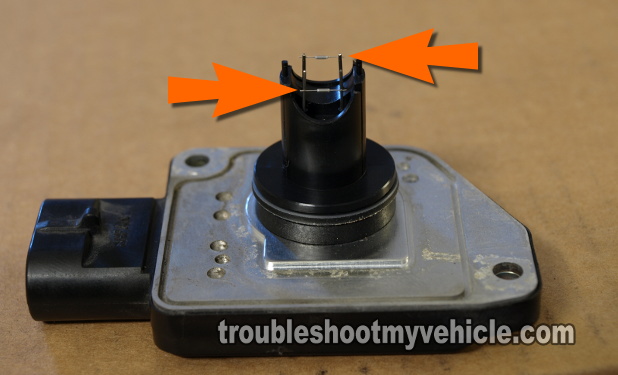
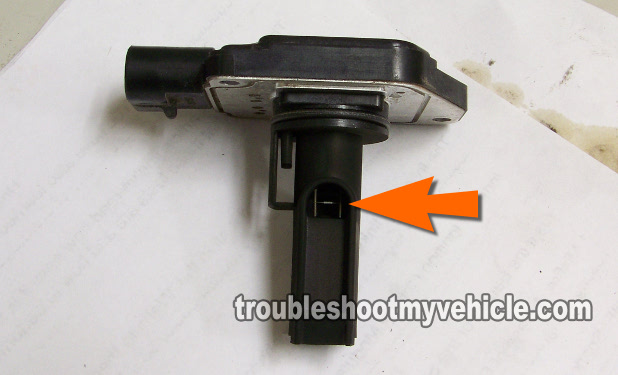
Once the MAF sensor is off of the vehicle, place it on a work table.
Just a friendly reminder and a very important one! -With the older type of MAF sensor (photo 1), you've got to be very careful not to bump the hot wires against anything or they'll break off.
The MAF sensor's hot wires (in the older type) are exposed and are very delicate, this I have found out thru' unfortunate personal experience.
OK, this is what you need to do:
- 1
Grab your MAF cleaning spray or electronics duster spray and spray the two MAF sensor hot wires.
- 2
On the older type MAF sensor, the two hot wires are exposed and super easy to clean.
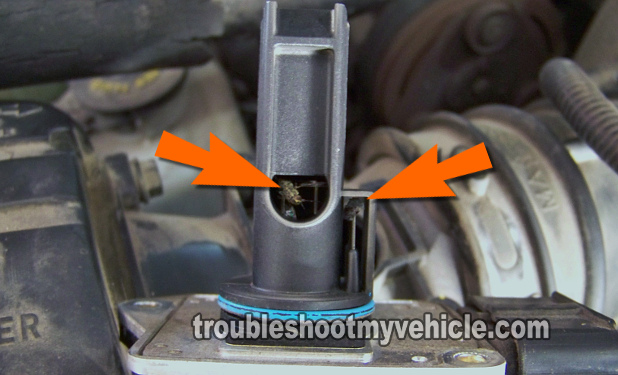
On the newer type of MAF sensor, both hot wires are inside the air inlet cavity but within view and these too can be easily cleaned by just spraying them. - 3
If the MAF sensor is dirty, both resistors on the hot wires will be full of dark fuzz.
A clean resistor is usually a light gray color, and of course, it won't have any type of fuzz on it. - 4
Resist the temptation to physically wipe the resistors of the two hot wires. Spraying them will clean them.
- 5
If you're using an approved cleaning spray, this will immediately evaporate without leaving any trace. So when you're done, put the MAF sensor back and bolt it up. You're done!
No Improvement In Performance After MAF Clean
Cleaning the MAF sensor is just a maintenance type of repair, just like changing the oil in the engine. Oil gets old and dirty, but changing it won't solve an engine mechanical issue, and so it goes with the MAF sensor.
Cleaning a MAF sensor will only improve engine performance and/or gas mileage if it's dirty. So, if cleaning it didn't do anything for the vehicle you're driving, you need to look into a deeper diagnostic.
If you need to test the MAF sensor itself, to see if it's producing a correct signal the PCM can use, check out my article on testing it with a multimeter at:
- MAF Sensor Test 1989-1996 (this article at: easyautodiagnostics.com)
- MAF Sensor Test 1996-2005 (this article at: easyautodiagnostics.com)
More 3.8L V6 GM Tutorials
You can find a complete list of tutorials here: GM 3.8L Index Of Articles. Below, is a sample of articles you'll find in this index of articles:
- How To Diagnose Misfire Codes P0300-P0306 (GM 3.8L)
- How To Do A Cylinder Balance Test (GM 3.8L V6).
- How To Test The 3.8L GM Crank Sensor With A Multimeter.
- How To Do An Engine Compression Test (GM 3.8L).

If this info saved the day, buy me a beer!


