TEST 3: Checking The Distributor Cap For Spark

Up this point, you've confirmed that some —but not all— of the spark plug wires are not sparking.
This points to one of two possibilities:
- The non-sparking spark plug wires are bad.
- The distributor cap towers connected to those wires are not transmitting spark properly (to those wires), indicating a bad distributor cap.
We can find out by doing a simple spark test on the distributor cap towers that connect to the non-sparking spark plug wires.
Let's get started
- 1
Connect the spark plug wires to their respective spark plugs (if any are currently disconnected).
- 2
Disconnect the spark plug wire that did not spark from its tower on the distributor cap.
NOTE: If you have multiple non-sparking spark plug wires, we'll test them one at a time. For this step, disconnect only one wire from its distributor cap tower. In Step 8, we'll move on to the next one. - 3
Insert the spark tester into the distributor cap tower.
- 4
Connect the spark tester to the battery negative (-) terminal using a battery jump start cable.
NOTE: The battery jump start cable will also help you hold the spark tester in the distributor tower. - 5
Have a helper crank the engine.
CAUTION: The engine may start during this test. Take all necessary safety precautions and remain alert. - 6
You'll get 1 of 2 results: Spark or no spark.
- 7
Remove the spark tester from the tower and reconnect the spark plug wire.
- 8
Repeat the test for any other distributor cap towers connected to non-sparking spark plug wires from TEST 1.
Let's interpret your test result:
CASE 1: The spark tester sparked while inserted in the distributor cap tower. This is the correct and expected test result.
It tells you that this particular distributor cap tower is transmitting spark properly. This also tells you that its non-sparking spark plug wire is bad. Replace all of the spark plug wires as a set.
CASE 2: The spark tester DID NOT spark while inserted in the distributor cap tower. This tells you that there's an issue with this particular distributor cap tower, indicating a bad distributor cap.
Replace the distributor cap and rotor and check the non-sparking spark plug wires for spark by repeating TEST 1.
TEST 4: Testing The Ignition Coil For Spark

After conducting TEST 2 and finding that the ignition coil's high tension wire does not spark, we now need to check for spark directly on the ignition coil's tower.
This test will help us determine if the problem lies with the ignition coil itself or if we need to continue to TEST 5 and check that it's getting power.
Let's begin:
- 1
Disconnect the high-tension wire from the ignition coil.
- 2
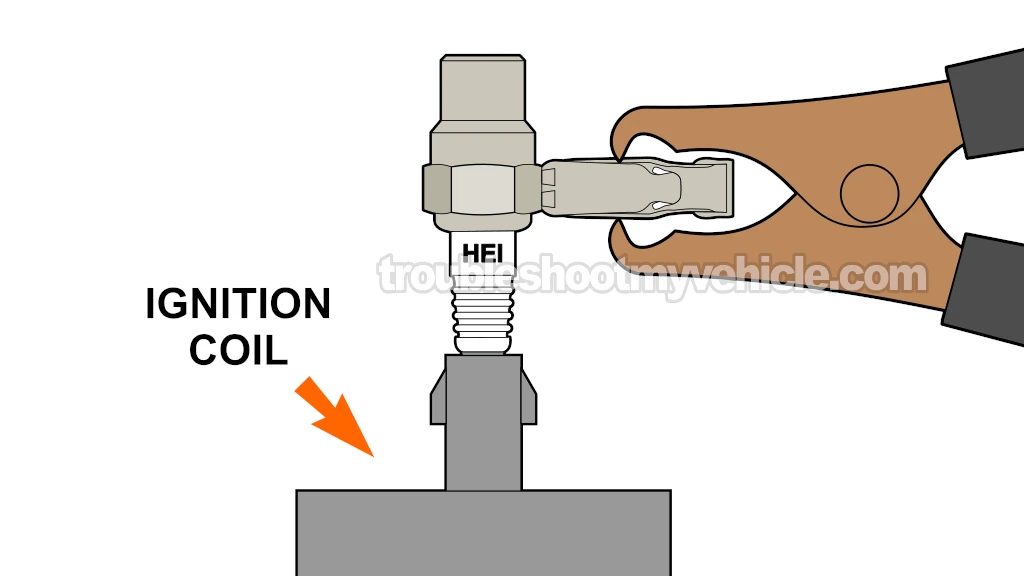
Insert the spark tester into the ignition coil's tower.
- 3
Connect the spark tester to the battery negative (-) post using a jump-start cable.
- 4
Have a helper crank the engine while you observe the spark tester for spark.
- 5
You'll see 1 of 2 things: spark or no spark.
Let's interpret your test result:
CASE 1: The spark tester sparked. This is the correct and expected test result.
With this test result, you can conclude that the ignition coil's high-tension wire is bad and needs to be replaced, if you have confirmed:
- All six spark plug wires are not sparking (TEST 1).
- The ignition coil's high tension wire is not sparking (TEST 2).
- The ignition coil's tower is sparking (this test section).
Replace all spark plug wires with a new set.
CASE 2: The spark tester DID NOT spark. This usually points to one of several issues:
- The ignition coil is bad.
- The ignition coil isn't getting power.
- The ignition coil isn't getting its activation signal (from the igniter).
Your next step is to check the ignition coil's voltage supply. Go to: TEST 5: Making Sure The Ignition Coil Is Getting Power.
TEST 5: Making Sure The Ignition Coil Is Getting Power

Up to this point, you have:
- Verified that all six spark plugs are not firing spark (TEST 1).
- Verified that the ignition coil's high tension wire is not sparking (TEST 2).
- Confirmed that the ignition coil itself is not sparking (TEST 3).
In this test section, we'll now check that the ignition coil is getting power. This power is in the form of 10 to 12 Volts DC.
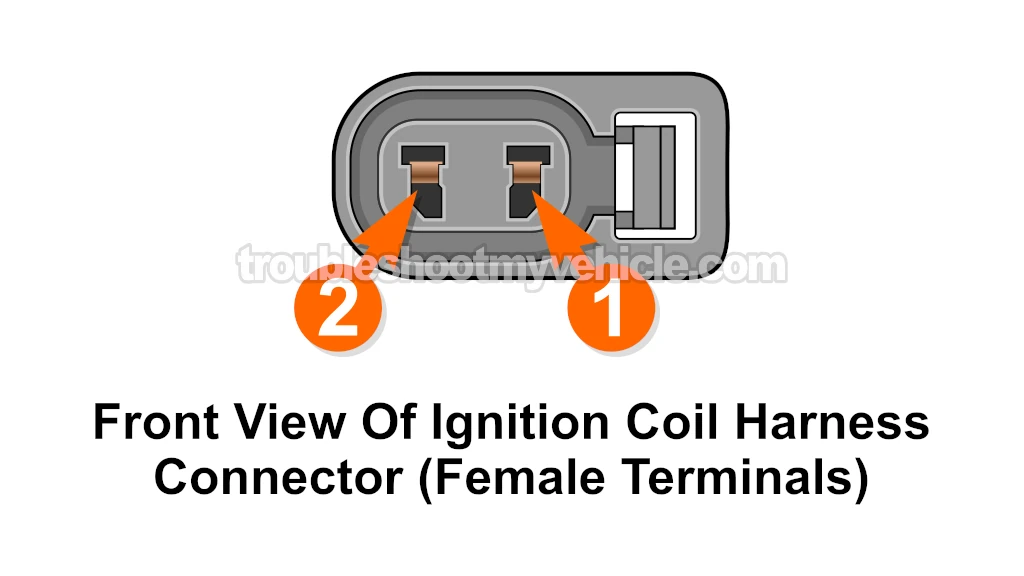
This voltage is delivered to the ignition coil via the white with red stripe (WHT/RED) wire of the coil's 2-wire connector.
These are the test steps:
- 1
Turn the key to the ON position but don't crank the engine.
- 2
Disconnect the ignition coil from its 2-wire connector.
- 3
Set your multimeter to Volts DC mode.
- 4
Connect the black multimeter test lead to the battery negative (-) terminal.
- 5
With the red multimeter test lead, probe the female terminal that corresponds to the white with red stripe (WHT/RED) wire of the ignition coil's 2-wire connector with the red multimeter test lead.
- 6
The multimeter should read 10 to 12 Volts DC.
Let's interpret your test result:
CASE 1: The multimeter read 10 to 12 Volts DC. This is the correct and expected test result.
The next step is to check that the ignition coil is receiving its activation signal. Go to: TEST 6: Making Sure The Ignition Coil Is Getting Its Activation Signal.
CASE 1: The multimeter DID NOT read 10 to 12 Volts DC. This usually points to a problem with the ignition switch.
Although it's beyond the scope of this tutorial, your next step is to find out why this voltage is missing and restore it.
