")
Troubleshooting a bad or clogged fuel injector on the 3.3L V6 engine in the 1999-2002 Nissan Quest or Mercury Villager can seem like an impossible task —since three of them live under the plastic intake manifold plenum.
But let me tell you, there's a method to the madness of troubleshooting a bad or clogged fuel injector on this engine. And although it's a process, it's not that difficult to do.
In this tutorial, I'm going to explain step-by-step how you can pinpoint the bad or clogged fuel injector in a straightforward, methodical way that'll help you trace a cylinder misfire issue to the exact source of the problem.
Contents of this tutorial:
- Symptoms Of A Defective Fuel Injector.
- Where To Buy The Fuel Injector.
- Testing The Fuel Injector Resistance.
- Checking The Injector's Resistance Directly At Its Terminals.
- The Intake Manifold Plenum Has To Be Removed.
- How To Find The Bad Or Clogged Fuel Injector.
- More 3.3L V6 Nissan Quest Diagnostic Tutorials.
APPLIES TO: This tutorial applies to the following vehicles:
- 3.3L V6 Nissan Quest: 1999, 2000, 2001, 2002.
- 3.3L V6 Mercury Villager: 1999, 2000, 2001, 2002.
FUEL INJECTOR CIRCUIT DIAGRAMS:
1993-1998 FUEL INJECTOR TESTS:
- How To Test The Fuel Injectors (1993-1995 3.3L V6 Nissan Quest).
- How To Test The Fuel Injectors (1996-1998 3.0L V6 Nissan Quest).
Symptoms Of A Defective Fuel Injector
One of the most important things we've got to know when we begin our diagnostic process is this —each of the six cylinders needs three things to produce power: spark, fuel, and compression.
And as you've probably guessed, it's the fuel injector that's responsible for delivering the fuel the cylinder needs to complete its combustion cycle. If an injector stops doing its job, your minivan's engine performance is going to take a hit. And when that happens, you're going to see one or more of the following issues:
- Cylinder misfire(s).
- A rough or unstable idle.
- Noticeable loss of power —especially when you accelerate under load (transmission in Drive).
The fuel injectors in your minivan can fail in a few different ways. Below are the most common types of failure I've encountered:
- The injector suffers an internal open-circuit or short-circuit. When this happens, it stops injecting fuel completely.
- The injector becomes clogged —either partially or completely. A partially clogged injector will still spray fuel, but not in a proper conical pattern, and this will absolutely affect engine performance.
- The fuel injector connector becomes damaged. Usually, the insulation on the wires cracks and peels off right where the wires exit the connector. Eventually, enough insulation is gone that the copper strands become exposed and short together.
In this tutorial, I'm going to help you figure out if you've got a bad or clogged fuel injector causing a rough idle or a cylinder misfire problem. We'll start by checking the internal resistance of all six injectors right from the PCM connector.
After that, if needed, we'll move on to some more in-depth checks. With your test results, we'll quickly figure out if you've actually got a fuel injector problem on your hands, or if the issue is being caused by something else.
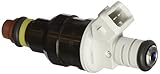
Where To Buy The Fuel Injector
If your fuel injector diagnostic test results indicate you've got a bad fuel injector that needs to be replaced, I've got a few recommendations for you. Below you'll find injectors from well-known automotive brands that I've used throughout my entire automotive repair career —and that I don't hesitate to recommend:

Disclosure: As an Amazon Associate, I earn from qualifying purchases. If my tutorials help you, using these links is an easy way to support the site at no extra cost to you. Thank you!
NOTE: Not sure if the fuel injectors fit your particular Nissan Quest or Mercury Villager? Don't worry. Once you get to the site, they'll ask you for the specifics of your vehicle and check to see if the part fits. If it doesn't, they'll find the right one for you.
Testing The Fuel Injector Resistance
")
")
According to the Nissan service specs, each fuel injector on your Nissan Quest or Mercury Villager should measure between 10 and 14 Ohms of internal resistance. As injectors age, they usually fail electrically in one of two ways.
- Internal open-circuit —Your multimeter will read infinite resistance, which tells you the injector's internal winding has an open-circuit problem.
- Internal short-circuit —Your multimeter will display 0 Ohms, confirming the injector's internal winding has a short-circuit issue.
At first glance, the only thing that complicates checking the fuel injector resistance of all six injectors is that three of them are located underneath the plastic intake manifold on your minivan. The good news is that we really don't have to remove the plenum to check them.
At this point in our diagnostic, we can test the entire fuel injector circuit —which includes the injector itself and the wiring between it and the PCM— right from your minivan's PCM connector.
Although checking the fuel injector circuits right from the PCM connector on your Nissan Quest or Mercury Villager is pretty easy, there are a few precautions you've got to take to make sure you don't damage the terminals or the connector itself. Before you begin, be sure to take a look at this guide I've written, which you can find here: How To Safely Probe The PCM Connector -Without Damaging It (1993-1998 3.0L V6 Nissan Quest) (this info applies to the 3.3L Nissan Quest and Mercury Villager too).
PCM LOCATION: On your 1999-2002 Nissan Quest or Mercury Villager, the PCM (powertrain control module/fuel injection computer) is located behind the glove box.
NOTE: If you don't have a multimeter or you need to upgrade the one you've got, this is the one I use and recommend: Tekpower TP8268 AC/DC Auto/Manual Range Digital Multimeter (Amazon affiliate link).
OK, let's get going:
- 1
Disconnect the battery's negative cable and leave it disconnected for the entire test.
NOTE: This step is important. Don't move on to the next step without first disconnecting the negative battery cable from the battery. - 2
Disconnect the PCM from its connector.
- 3
Set your multimeter to Ohms mode.
- 4
With your multimeter test leads —and the appropriate tool— probe between the following terminals of the PCM connector:
—BANK 1 UNDER INTAKE MANIFOLD PLENUM:
- Injector 1: Pins 102 (GRN/ORG) and 80 (YEL).
- Injector 3: Pins 104 (GRN/RED) and 80 (YEL).
- Injector 5: Pins 106 (YEL/GRN) and 80 (YEL).
—BANK 2:
- Injector 2: Pins 109 (GRN) and 80 (YEL).
- Injector 4: Pins 111 (YEL/PPL) and 80 (YEL).
- Injector 6: Pins 113 (GRY/BLU) and 80 (YEL).
NOTE: Use the connector pinout above to locate VPWR (pin 80) and the injector pins.
- 5
Write the resistance value down on a piece of paper, and make sure you note which injector that value belongs to.
- 6
Your multimeter should report a resistance between 10 and 14 Ohms for each injector circuit.
If the meter shows an open-circuit, a short-circuit, or a resistance outside the 10-14 Ohm range, that injector circuit is bad.
Now let's break down what your multimeter readings are telling you.
CASE 1: All six injector circuits fall within the specified resistance range. This test result indicates that there aren't any electrical issues with the fuel injector itself or with the wiring between the injectors and the PCM. Specifically, there aren't any open or short-circuit problems in these circuits.
Unfortunately, the fuel injectors aren't off the hook just yet. There's still the possibility that you've got a clogged injector. A clogged injector will pass a resistance test but still fail to deliver fuel to its cylinder —either because it's spraying too little fuel or none at all— which will trigger a cylinder misfire.
We need to continue our diagnostic, go to: How To Find The Bad Or Clogged Fuel Injector.
CASE 2: One or more injector circuits read infinite resistance or 0 Ohms. This test result confirms that there's an electrical issue affecting that fuel injector circuit on your Nissan Quest or Mercury Villager minivan.
We still need to do a little more digging, because this result doesn't tell us exactly where the problem lies. In other words, at this point we don't know if the injector has failed internally, or if the problem is with the connector or the wiring between it or the PCM.
To continue troubleshooting, our next step is to check the injector's resistance directly at its two terminals. Head over to: Checking The Injector's Resistance Directly At Its Terminals.
Checking The Injector's Resistance Directly At Its Terminals
")
If you've reached this point, then at least one of the fuel injectors on your Nissan Quest or Mercury Villager didn't pass the resistance check. In most cases, your multimeter probably showed you one of the following results.
- Infinite Ohms —which tells you the injector circuit is open somewhere.
- 0 Ohms —which confirms the circuit is shorted.
- A resistance value outside the normal range —not a full open or short, but still not within spec.
When a fuel injector circuit fails its resistance test, it almost always points to one of two things: either the fuel injector itself is toast, or there's an issue with its two-wire connector. And when the connector is the problem, it's usually the two wires coming out of it that are to blame.
Thankfully, we can easily figure out which of the two we're dealing with by doing a couple of quick checks.
- Visually inspect the injector connector and its two wires.
- On these Nissan Quest and Mercury Villager minivans, it's very common for the insulation on the two wires coming out of the connector to crack and peel. When that happens, the copper strands are exposed and usually short together.
- Measure the injector's resistance directly at its terminals.
- The injector itself may have an internal electrical failure, which is actually the most common reason a fuel injector circuit fails its resistance test.
- When you check resistance right at the injector male spade terminals, you should see a reading between 10 and 14 Ohms.
The only thing that complicates things just a bit (actually, a lot) is if the failed fuel injector circuit belongs to cylinders 1, 3, or 5, since those injectors are located underneath the plastic intake manifold plenum. To access them —and check the injector's resistance directly at its two male spade terminals— you'll need to remove the plastic plenum.
If one of these circuits fails its resistance test and you're looking at removing the plenum, you've got to make sure —before you pull the plenum— that the cylinder it belongs to is getting spark and has good compression. See: How To Find The Bad Or Clogged Fuel Injector.
If the cylinder (that the failed fuel injector circuit belongs to) is getting good spark, its spark plug is in good shape, and it's got good compression, then the next move is to remove the plenum. Once it's off, you can check the fuel injector's resistance directly at its terminals and closely inspect its connector (especially the wires coming out of it). Be sure to take a look at the suggestions in this section: The Intake Manifold Plenum Has To Be Removed.
When it comes to testing the fuel injectors for cylinders 2, 4, and 6, life is way easier, since those injectors are fully accessible and you don't have to remove anything to check their resistance (directly at their male spade terminals).
The Intake Manifold Plenum Has To Be Removed
")
It may seem, especially when you're staring down at the engine, that pulling the intake manifold plenum is a complete pain in the neck. I'll be honest —it's a process, but it's doable. I've done it many times on the 3.3L V6 Nissan Quest (see photo above), and it's not as hard as it looks.
That said, I do want to give you a few important suggestions and precautions to follow, so this job doesn't turn into a headache or a nightmare:
- Cover the lower intake ports. Once the plenum is off, place clean shop towels over the exposed lower intake manifold runners. This is critical. You do not want a bolt, washer, or any other metal piece falling into one of those ports while you're testing the injectors.
- Keep removed hardware stored away from the engine compartment. As you remove bolts and nuts, drop them into a small container and keep them away from the engine bay. It's way too easy for something to slip and disappear into a spot where you don't want it (ask me how I know).
- Use new gaskets. The plastic intake manifold plenum uses rubber gaskets, and they shouldn't be reused. The other important thing to keep in mind is that they need to be installed dry. In other words, don't apply any type of sealant —like RTV silicone— on them. These rubber gaskets were designed to be installed dry, and they'll seal just fine on their own without any sealant.
- If you find a bad injector connector, solder the replacement. Don't use crimp-style butt connectors. They won't hold up to heat and vibration, and you'll end up right back where you started —with a misfire. Soldering the new connector into the harness is the only long-term, reliable fix.
One final thing —and this is a big one: don't let anything fall into the exposed lower intake manifold runners. If a bolt, nut, or any small hardware drops into one of those ports and the engine gets cranked, that cylinder is going to be in serious trouble.
If something metallic does fall into one of the open intake manifold ports, the piston and valves in that cylinder are going to get damaged. At that point, the only way to retrieve whatever fell in —and to see how bad the damage is— is to remove the cylinder head.
So take your time here. A little care up front, and taking a few simple precautions while removing the plastic plenum, can save you from making a very expensive mistake.
How To Find The Bad Or Clogged Fuel Injector
With the right diagnostic strategy —and by that I mean a methodical process of elimination— you can easily pinpoint a bad or clogged fuel injector that's causing a misfire or a rough idle on your 3.3L V6 Nissan Quest or Mercury Villager.
In a nutshell, knowing where to begin is gonna save you a ton of time and help you avoid the frustration of throwing parts at a problem that won't fix it. This is especially important because so many different things can cause your minivan's engine to suffer from a cylinder misfire or a rough idle.
Below, you'll find my diagnostic strategy explained —the one I've used my entire automotive repair career— to pinpoint the exact cause of a misfire or rough idle problem. It's going to help you, too. And the best part is, you won't need any expensive diagnostic equipment to run these tests.
OK, this is the step-by-step of what I do:
- Identify the dead cylinder:
- This step usually involves connecting a code reader or a generic scan tool to your Nissan Quest or Mercury Villager minivan and checking to see if you've got any cylinder-specific misfire codes (P0301-P0306) stored in the PCM's memory.
- If no misfire code is present, you'll need to run a manual cylinder balance test. If you've never done one before, no worries —I've put together a step-by-step guide that shows you exactly how to do it: How To Do A Manual Cylinder Balance Test (1993-1998 3.0L V6 Nissan Quest) (this tutorial also applies to the 3.3L V6 engine).
- Confirm the dead cylinder is actually getting spark:
- To get the most accurate test result, checking for spark involves using a spark tester on the spark plug wire (of the dead cylinder) to make sure it's actually getting spark.
- If the spark plug wire is delivering spark, the next step is to visually inspect it for any damage or wear that could allow the spark to arc to Ground (before it reaches the spark plug).
- After confirming spark —and the condition of the spark plug wire— the next step is to remove the spark plug from the cylinder and inspect it closely. The spark plug's air gap should be free of carbon buildup. The ceramic insulator should be intact, with no cracks whatsoever. You'll also want to check for any carbon tracks on the ceramic insulator. In a nutshell, the spark plug should be in near-perfect condition.
- You'll also want to look inside the spark plug wire boot to make sure there aren't any carbon tracks in there. If there are, the spark can arc to Ground from inside the boot before it ever reaches the spark plug.
- This is especially important if you've got valve cover gaskets that are leaking oil onto the spark plugs, which is a pretty common cause of cylinder misfire issues. Here's a real-world case study that shows exactly how this causes misfires: Carbon Tracks Are A Common Cause Of Ignition Misfires (at: easyautodiagnostics.com).
- Verify the dead cylinder has solid compression:
- It's super important to make sure the cylinder can actually compress its air-fuel mixture. If a cylinder's compression is weak or missing, that cylinder's going to misfire —no matter if it's getting spark or if its fuel injector is delivering fuel.
- If you've never done a compression test before, I've put together a step-by-step tutorial that shows you how to do it —and, more importantly, how to interpret the results. You can find it here: How To Do And Interpret An Engine Compression Test (1999-2002 3.3L V6 Nissan Quest).
- Test the dead cylinder's fuel injector resistance:
- Once you've ruled out a lack of spark and compression as the cause of the cylinder's misfire, it's time to check the injector's internal resistance.
- If the injector's resistance falls outside the specified range, you've found your problem —the injector has an internal electrical problem.
- If the resistance is within spec, and you've already confirmed the cylinder has spark and good compression, the injector is almost always clogged. It may pass its resistance test, but it's not delivering fuel properly. At that point, the next step is to replace it.
At the core of the diagnostic strategy I just outlined above is a simple process of elimination. And I want to emphasize that the most critical first step is pinpointing the dead cylinder. Once you know which cylinder isn't doing its job, the rest of the diagnostic process becomes much easier.
From the moment you've ID'd the dead cylinder, every test you perform is aimed at answering these basic questions: What is that cylinder missing? Is it missing spark? Is it missing compression? Or is it not getting fuel?
Working through the tests to answer those questions is what keeps your diagnostic focused and on a logical path. Let me tell you from personal experience —this strategy will save you a lot of time and money. You'll avoid the frustration of buying and installing parts that, at the end of the day, don't fix the problem.
And even if you decide not to troubleshoot the issue yourself, you'll still be much better informed when talking to the automotive technician working on your minivan.
More 3.3L V6 Nissan Quest Diagnostic Tutorials
You can find a complete list of 3.3L V6 Nissan Quest and Mercury Villager tutorials in this index:
Here's a sample of the tutorials you'll find there:
- How To Test The MAF Sensor (1999-2002 3.3L V6 Nissan Quest).
- Common Causes Of Spark Plug Failure (1999-2002 3.3L V6 Nissan Quest).
- How To Test For A Blown Head Gasket (1999-2002 3.3L V6 Nissan Quest).
- How To Do And Interpret An Engine Compression Test (1999-2002 3.3L V6 Nissan Quest).

If this info saved the day, buy me a beer!
